
Bharatkosh Payment:How to Pay, Track Status and Download Your Receipt (2026)
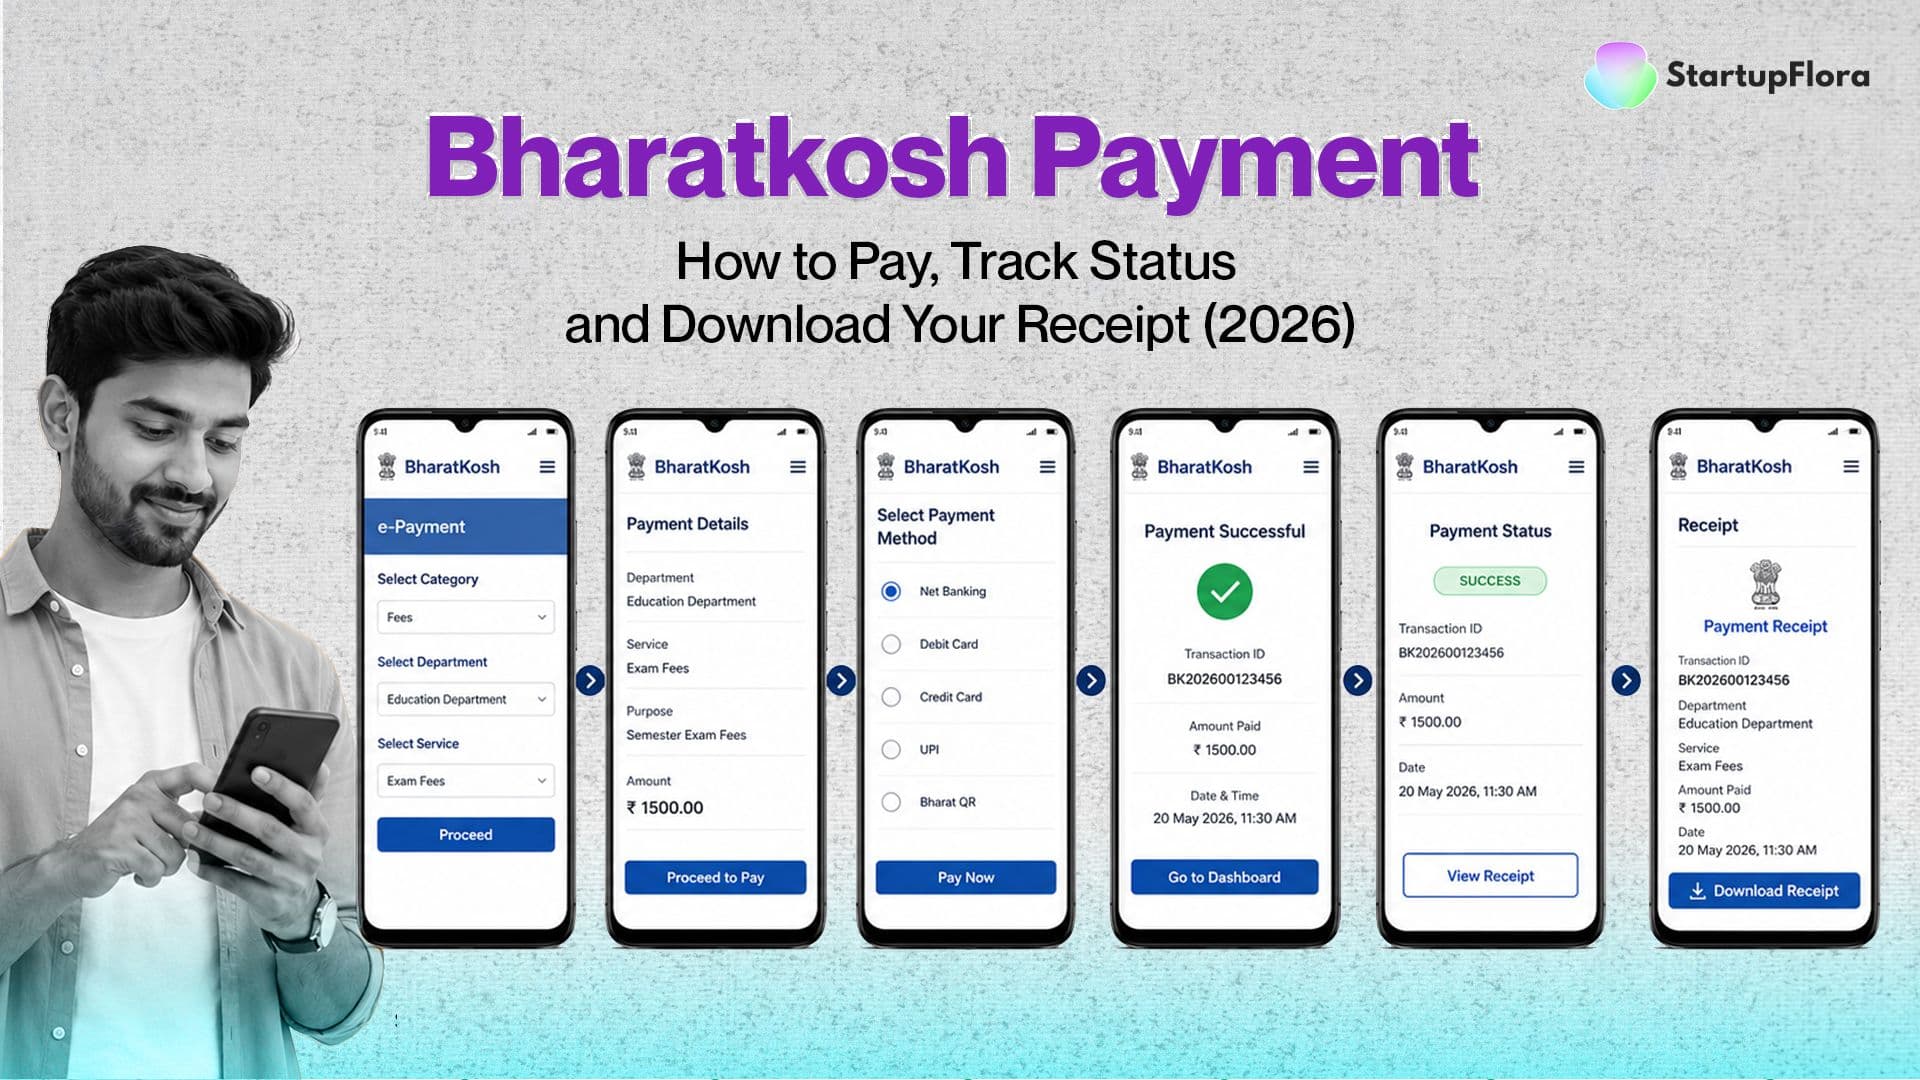
If a government department has told you to "pay the fee on Bharatkosh," you have probably landed on a portal that asks for a Purpose, a PAO code and a DDO code before it will take a rupee from you. It is not obvious, and one wrong selection means your money reaches the wrong department's account. Bharatkosh is the Government of India's Non-Tax Receipt Portal (NTRP). It is where you pay anything that is not a tax: RTI application fees, tender fees, exam fees, licence fees, testing charges, penalties, and donations. No bank queue, no demand draft, no visit to a government office. This guide covers the three things people actually need. How to make a Bharatkosh payment correctly the first time, how to check your Bharatkosh payment status when the screen fails but your money leaves, and how to download your payment receipt (GAR 6) and challan (GAR 7) afterwards. Everything here follows the official CGA user guide.
Benefits of Paying Through Bharatkosh

No Bank Visits or Demand Drafts
The whole point of the portal. You pay online instead of preparing a DD and carrying it to a government office.

Available 24x7, All Year
Electronic deposits into government accounts at any hour, from anywhere, through a web browser.

Instant Digital Receipt
Your GAR 6 receipt is generated on the success page immediately, which is usually what the department asks you to attach to your application.

Works Without Registration
For most one-off payments you can use the non-registered route and never create an account.

Transparent Tracking
Every transaction is traceable through the portal using your mobile number, with status visible against each payment.

Direct to the Right Department
Because the Purpose maps to a specific PAO and DDO, your money lands in the correct account head rather than a general pool.
Quick facts
How to Make a Bharatkosh Payment

Open the Portal and Choose Your Route
Go to bharatkosh.gov.in. You will see options including Quick Payment, Common Receipts to GoI, Non-Registered Users, Contribution/Grant to NDRF, and Register as User.
Non-Registered Users / Quick Payment — for most one-off department-specific payments
Common Receipts to GoI — for purposes common across ministries, such as RTI fees
Register as User — only needed if you pay often, or want NEFT/RTGS

Search and Select the Correct Purpose
Type a few characters of your purpose and click the search icon. Pick the exact match from the results.
This is the step that matters most. Once you select the Purpose, the portal automatically fills in the mapped PAO code and DDO code. If you choose the wrong purpose, your money goes to the wrong office, and departments will generally not reverse it for you. If your department gave you a specific purpose name or PAO/DDO code, match it exactly.

Enter Amount and Frequency
Type the amount, choose the payment period or frequency, and add remarks. Note that some purposes accept only an exact value (tender fee or exam fee, for example), while others allow any amount up to the RBI limit for online payments. Depositor Category, Purpose, Amount and Payment Period are all mandatory.
Use the Add button if you are paying for more than one purpose in the same transaction, then click Next.

Fill In Depositor Details
Enter your details carefully. Mandatory fields include Depositor Name, Address, Country, State, District, City, PIN code, TAN, TIN, PAN, Aadhaar, Mobile Number and Email ID.
Get the mobile number right. It is how you will track the payment and recover your receipt later.

Confirm Everything
The portal shows all depositor details in a table. Check the Purpose, PAO code and DDO code once more. This is your last chance before the money moves.

Choose Payment Mode and Pay
Select Online (default) and pick a channel: Net Banking, Debit Card, Credit Card or UPI. For Net Banking, select the SBIePay option and choose your bank from the dropdown. Enter the word verification, click Pay, and complete the transaction on your bank's page.

Download Your GAR 6 Receipt
On success, you land back on the Bharatkosh success page where you can download your GAR 6 receipt immediately. You will also get an SMS on the number you provided. Download it now rather than later.

Open the Portal and Choose Your Route
Go to bharatkosh.gov.in. You will see options including Quick Payment, Common Receipts to GoI, Non-Registered Users, Contribution/Grant to NDRF, and Register as User.
Non-Registered Users / Quick Payment — for most one-off department-specific payments
Common Receipts to GoI — for purposes common across ministries, such as RTI fees
Register as User — only needed if you pay often, or want NEFT/RTGS

Search and Select the Correct Purpose
Type a few characters of your purpose and click the search icon. Pick the exact match from the results.
This is the step that matters most. Once you select the Purpose, the portal automatically fills in the mapped PAO code and DDO code. If you choose the wrong purpose, your money goes to the wrong office, and departments will generally not reverse it for you. If your department gave you a specific purpose name or PAO/DDO code, match it exactly.

Enter Amount and Frequency
Type the amount, choose the payment period or frequency, and add remarks. Note that some purposes accept only an exact value (tender fee or exam fee, for example), while others allow any amount up to the RBI limit for online payments. Depositor Category, Purpose, Amount and Payment Period are all mandatory.
Use the Add button if you are paying for more than one purpose in the same transaction, then click Next.

Fill In Depositor Details
Enter your details carefully. Mandatory fields include Depositor Name, Address, Country, State, District, City, PIN code, TAN, TIN, PAN, Aadhaar, Mobile Number and Email ID.
Get the mobile number right. It is how you will track the payment and recover your receipt later.

Confirm Everything
The portal shows all depositor details in a table. Check the Purpose, PAO code and DDO code once more. This is your last chance before the money moves.

Choose Payment Mode and Pay
Select Online (default) and pick a channel: Net Banking, Debit Card, Credit Card or UPI. For Net Banking, select the SBIePay option and choose your bank from the dropdown. Enter the word verification, click Pay, and complete the transaction on your bank's page.

Download Your GAR 6 Receipt
On success, you land back on the Bharatkosh success page where you can download your GAR 6 receipt immediately. You will also get an SMS on the number you provided. Download it now rather than later.
Who Uses Bharatkosh
Citizens
Anyone paying an RTI fee, exam fee, or buying a government publication.
Businesses and Startups
Companies paying tender fees, licence fees, exhibition fees or testing and inspection charges to central departments.
Consultants and Professionals
Advisors making departmental payments on behalf of clients, who need clean receipts for their files.
Donors
Individuals and corporates contributing to Swachh Bharat Kosh or NDRF, including for CSR purposes.
Common Mistakes to Avoid
Selecting the Wrong Purpose, PAO or DDO
The most expensive mistake on this portal. The Purpose determines where your money lands, and the department will not take responsibility for a wrong selection. Match the purpose your department told you to use, exactly.
Re-paying After a Failed Screen
If money was debited, do not pay again. Check status the next day. Double payments are painful to recover.
Entering the Wrong Mobile Number
Your mobile number is the key to Track your Payment and to recovering your receipt. A typo here can lock you out of your own transaction history.
Not Downloading GAR 6 Immediately
The success page is the easiest place to get it. Save it there rather than hunting for it later.
Expecting the Challan Instantly
GAR 7 takes about two days. If you need proof before that, use GAR 6.
Forgetting the UTR for Offline Payments
An NEFT payment without the UTR entered on the portal stays unreconciled.
Using Agent Websites
Bharatkosh is a government portal and charges no service fee of its own beyond applicable user charges shown on the payment page. Pay only at bharatkosh.gov.in.
What you can download
FAQs
What is Bharatkosh?
Bharatkosh, also called the Non-Tax Receipt Portal (NTRP), is an initiative of the Office of the Controller General of Accounts (CGA), Department of Expenditure, Ministry of Finance. It runs on the PFMS platform and connects all civil ministries and departments of the Government of India.
Its job is simple: give you one place to deposit any fee, fine, or other money into a Government of India account, 24x7, without visiting a bank.
What you can pay through Bharatkosh:
RTI application fees
Tender fees, exhibition fees and licence fees
Examination fees
Testing and inspection charges
Spectrum charges, dividends and interest receipts
Purchase of forms, magazines and Publication Division subscriptions
Donations to Swachh Bharat Kosh and contributions to NDRF
What Bharatkosh is not: it does not handle income tax, GST, or any direct or indirect tax. Those have their own portals. Bharatkosh is strictly for non-tax receipts.
Bharatkosh Payment Status: How to Track Your Payment
This is the section most people need in a hurry, usually because the payment screen failed but the bank still debited them.
How to check your Bharatkosh payment status
Go to bharatkosh.gov.in and click Track your Payment
You reach the Verify Mobile No page. Enter the mobile number you used while making the payment, along with the security code
Click Send OTP. A 6-digit OTP arrives on that number
Enter the OTP and click Verify
You land on the Track your Payment page, with every transaction made from that mobile number listed in a table
Read the Status column against your transaction
Click the Transaction Reference Number to open a pop-up with the full details of that payment
Registered users can skip the OTP step and simply click Track your Payment after logging in.
If the payment failed but money was debited
This is the single most important thing on this page, and it comes straight from the official guide.
Do not re-initiate the payment for the same purpose. If you were sent to a failure page but your bank account was debited, the amount will still be credited to the Government account. Paying again means paying twice, and getting the second payment back is far harder than waiting.
Instead, check the status the next day through Track your Payment. In most cases it will have settled to success on its own.
If it genuinely did not go through and the money has not returned, use the Apply for Refund option on the portal, and contact the concerned department's PAO with your Transaction Reference Number.
How to Download Payment Receipt from Bharatkosh
There are two moments you can get your receipt, and two different documents.
Right after payment (GAR 6)
On the success page, click the download option for GAR 6, which is your transaction receipt. You will also receive an SMS telling you to download it from the portal.
Later, from Track your Payment
If you closed the window or need the receipt again, you can recover it any time:
Go to Track your Payment on bharatkosh.gov.in
Verify your mobile number with the OTP (or log in, if registered)
Find your transaction in the list
Click the Transaction Reference Number to open the pop-up
From this window, download your documents
Offline Payment via NEFT / RTGS
Some purposes allow an offline route. It works differently and needs preparation.
You must be registered as a NEFT-based user. During registration, tick the NEFT Based Transaction checkbox and provide your Bank Name, Bank Account Number and IFSC Code
Select the Swift/NEFT/RTGS radio button on the depositor details page
Complete the flow and download the Deposit Slip at the final page
Carry the Deposit Slip to your bank branch and ask the counter official to initiate NEFT into the PAO's bank account shown on the slip
Ask the bank official to write the UTR number on the Deposit Slip
Log back in at Bharatkosh, go to Track your transaction, and enter the UTR number against that transaction
Conclusion
Bharatkosh removes the demand draft and the bank queue from government payments, but it asks for something in return: precision. The Purpose you select decides the PAO and DDO, and that decides where your money goes.
Three things will save you the most trouble. Select the exact Purpose your department told you to use, and check it on the confirmation page before paying. Download your GAR 6 receipt straight from the success page, because that is what departments ask for. And if a payment fails while your account is debited, do not pay again — check the status the next day through Track your Payment.
Ready to pay? Go to bharatkosh.gov.in, use the Quick Payment or Non-Registered Users route for a one-off payment, keep the mobile number handy for tracking, and save your receipt before you close the tab.
StartupFlora provides consultancy services only. We are not affiliated with any government department. All scheme benefits and approvals are at the sole discretion of the respective government authority and implementing agency.